Notifications
The dashboard provides a special secure Websocket endpoint
wss://dash.mongoose-os.com/api/v2/notify. This is a read-only notifications endpoint.
Each notification is a JSON object with three keys:
name: notification name, e.g. "online", "offline", "rpc.in.GetInfo", "rpc.out.Log"id: an ID of a device that generated the eventdata: optional notification-specific data.
The online and offline events are generated by the dashboard. The
rpc.out.* events are generated by the device: these are JSON-RPC requests
without an ID (notifications). For example, dash library forwards all
device logs to the dashboard as Log RPC calls, thus generating rpc.out.Log events.
RPC call to the device generate rpc.in.* events.
The dashboard UI uses /api/v2/notify endpoint in order to catch state changes.
Login to the dashboard and open the developer tools / network / WS panel to
see it in action.
How to catch notifications from all devices
You can implement your own service that attaches to the /api/v2/notify,
for example in Node JS (don't forget to substitute API_TOKEN with your real
API access token):
const Websocket = require('ws');
const addr = 'wss://dash.mongoose-os.com/api/v2/notify?access_token=API_TOKEN';
const ws = new Websocket(addr, { origin: addr });
ws.on('message', msg => console.log('Got message:', msg.toString()));
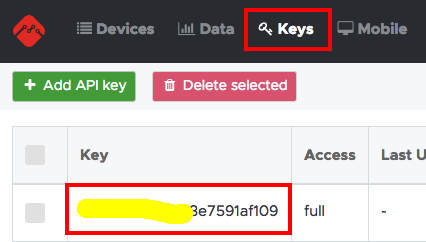
To see your mDash API tokens, login to mDash and click on "Keys" tab:
How to send a notification from your device
The API is documented at mDash API. Below are quick examples.
In C/C++:
mgos_dash_notifyf("MyStat", "{temperature: %f}", 12.34);
In JavaScript:
Dash.notify('MyStat', {temperature: 12.34});
Note that the format of data is arbitrary - it could be anything: a number,
a string, an array, or a complex nested object. It's up to you. In this
example, a simple object {"temperature": 12.34} is used. The
example generates the following notification:
{
  "id": "DEVICE_ID",        // This is the device ID that generated notification
  "name": "rpc.out.MyStat", // "rpc.out.EVENT_NAME", in our case rpc.out.MyStat
  "data": {"temperature": 12.34}  // Your event payload - arbitrary
}
Further possible actions:
- Catch this notification (see section above) and do your custom action
- Modify the PWA mobile app, which catches all notifications, and show the data somehow to the user
- Save the data automatically to the database, and graph it. See Data Storage section