Advanced guide: C/C++
In this guide we will learn how to implement device logic in C/C++. In particular, our firmware will:
- have an ability to read DHT22 temperature/humidity sensor data
- set up a timer to read and print sensor data to the debug console
- implement a RPC service for reading the sensor remotely - for example, via MQTT
Start mos tool
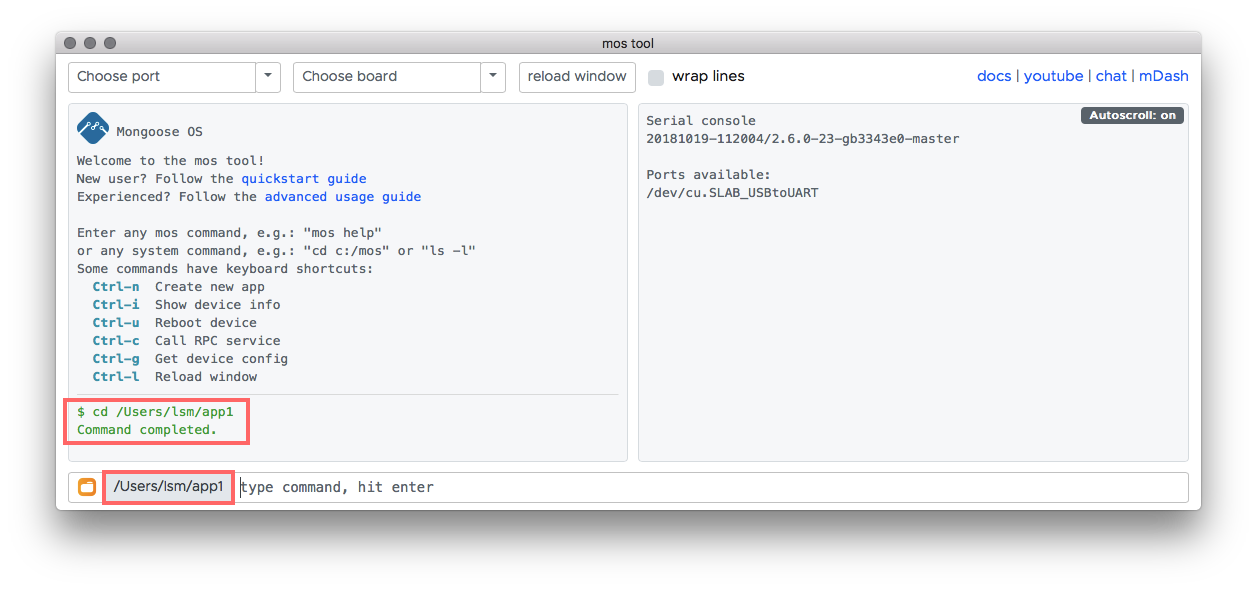
Run mos tool without arguments to start the Web UI. After start,
the Web UI changes current working directory to the directory where
it finishes the last time. In other words, it "remembers" its settings:
the working directory, chosen port, board, etc.
In this example, it is an app1 directory, a quickstart example I have done recently:
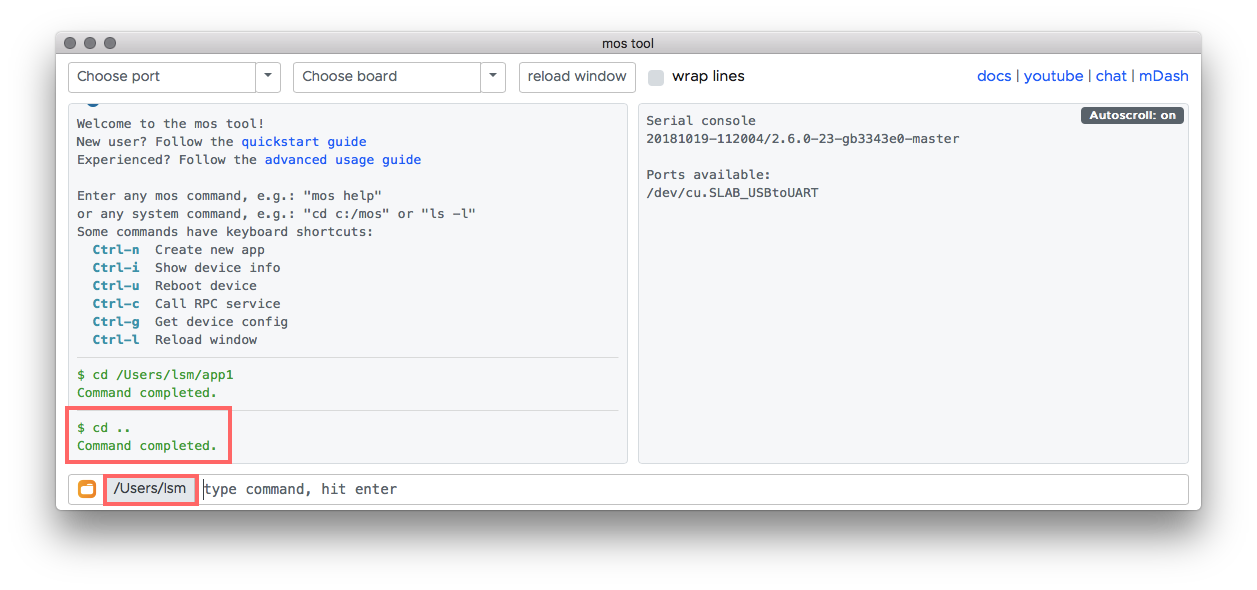
Since we are going to create our new app in a different directory,
use the cd DIRECTORY command to change the current directory.
I am going to do cd .. to go up one level. Notice the current directory change:
Clone template project
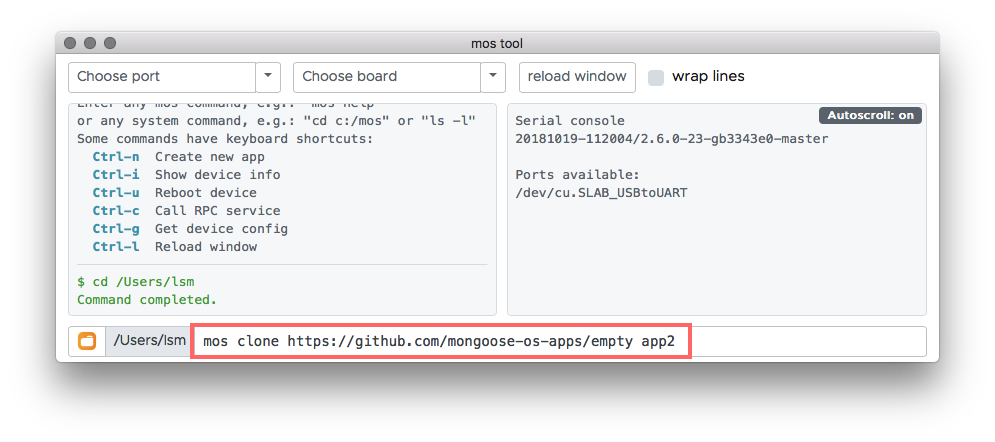
Now we are going to use a mos clone URL DIRECTORY command, in order to clone
some remote app into a DIRECTORY. Press Ctrl-n - that populates the input field
with mos clone https://github.com/mongoose-os-apps/demo-js app1 . We don't
want to use demo-js as a template, so change it to empty to use a minimal
app, and change app1 to app2:
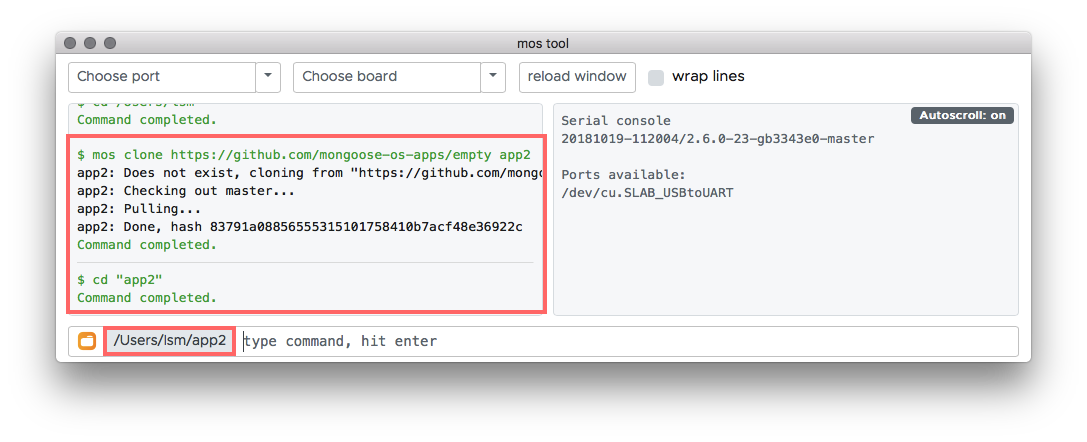
Now press Enter to execute the command. Notice that the mos tool automatically changes enters into the cloned directory:
Learn app directory structure
Click on the folder icon on the bottom left corner to open a system file browser in the current directory:
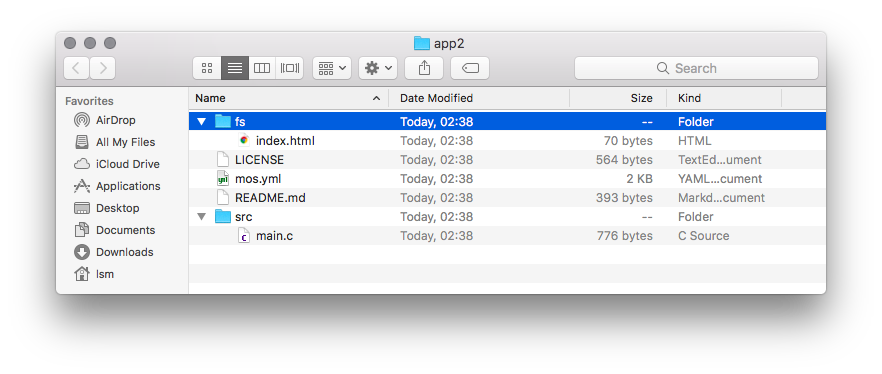
Here is the meaning of all files:
  fs/             -- All files we put here, will end up on device's filesystem
  └─ index.html   -- Device's HTTP server, if enabled, will serve this file
  LICENSE
  mos.yml         -- Describes how to build an app
  README.md       -- Document your app in this file
  src/
  └─ main.c       -- Contains device logic. We are going to edit this file
Add necessary libraries
Open mos.yml file in your favorite editor and add support for DHT sensor:
libs:
  - origin: https://github.com/mongoose-os-libs/rpc-service-config
  - origin: https://github.com/mongoose-os-libs/rpc-service-fs
  - origin: https://github.com/mongoose-os-libs/rpc-uart
  - origin: https://github.com/mongoose-os-libs/wifi
  - origin: https://github.com/mongoose-os-libs/dht  # <-- Add this line!
Note - all available libraries are collected under the https://github.com/mongoose-os-libs organisation. They are categorised
and documented under the "API Reference" docs section.
Now, open src/main.c, you'll see the following
skeleton code which initialises an app that does nothing:
#include "mgos.h"

enum mgos_app_init_result mgos_app_init(void) {
  return MGOS_APP_INIT_SUCCESS;
}
Create custom configuration section
Let's add a code that reads from a DHT temperature sensor every second.
The pin to which a sensor is attached, we make configurable by editing
a config_schema: section in the mos.yml, to have it like this:
config_schema:
 - ["app.pin", "i", 5, {title: "GPIO pin a sensor is attached to"}]
This custom configuration section will allow us to change sensor pin
at run time, without recompiling firmware. That could be done programmatically
or via the mos tool, e.g. mos config-set app.pin=42.
NOTE: see mos.yml file format reference
for the full documentation about the mos.yml.
Add code that uses sensor library
Then, edit src/main.c, add a timer (see timer api docs) that reads DHT and logs the value
(error handling is intentionally omitted):
#include "mgos.h"
#include "mgos_dht.h"

static void timer_cb(void *dht) {
  LOG(LL_INFO, ("Temperature: %lf", mgos_dht_get_temp(dht)));
}

enum mgos_app_init_result mgos_app_init(void) {
  struct mgos_dht *dht = mgos_dht_create(mgos_sys_config_get_app_pin(), DHT22);
  mgos_set_timer(1000, true, timer_cb, dht);
  return MGOS_APP_INIT_SUCCESS;
}
The mgos_dht.h file comes from the dht library that we have included to our app.
In order to find out its documentation and API, navigate to
"API Reference" -> "Drivers" -> "DHT temp sensor". This should bring you to
this page - DHT temp sensor. Similarly, you can find
out about any other library.
Build the app and test sensor reading
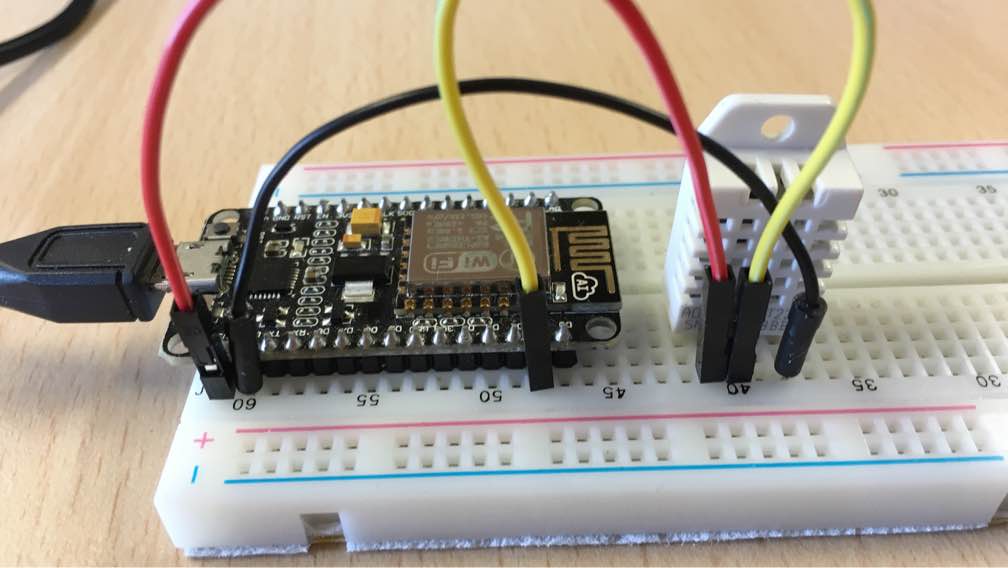
Connect DHT sensor to pin 5. The sensor itself has following pins:
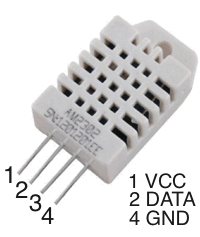
This is an example with ESP8266 NodeMCU. Red connector is VCC 3.3 volts, black connector is ground GND, and yellow is data, connected to pin 5:
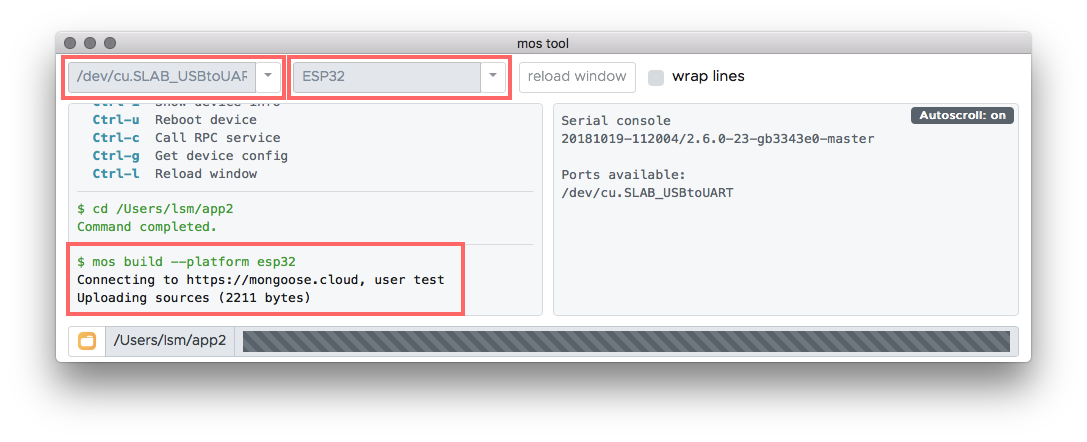
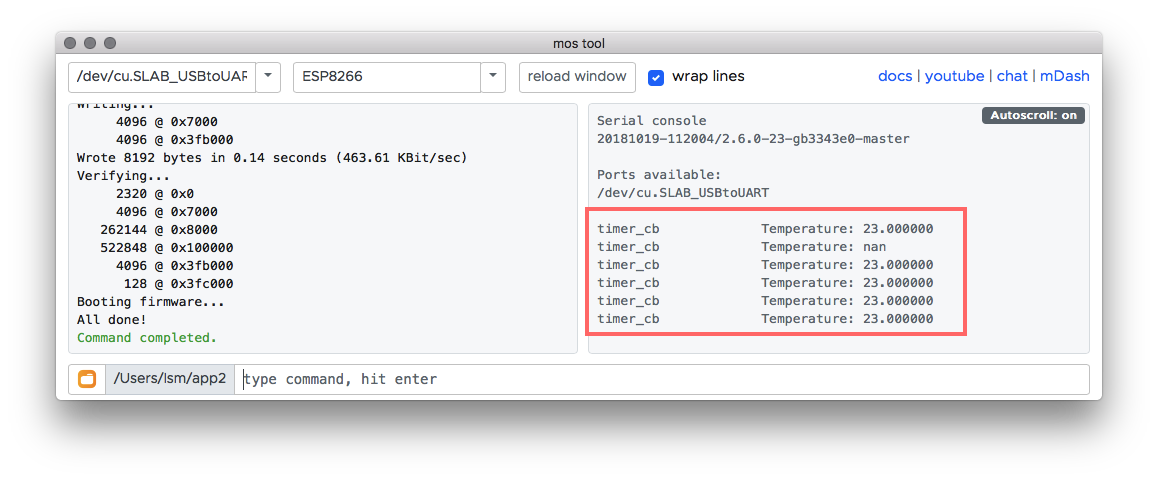
Build, flash the firmware, and attach the console to see device logs. Assume we're working with ESP8266:
Choose your board and port in the the UI, and run mos build command:
When finished, run mos flash to flash the firmware and see the output in the console:
Add RPC service to read sensor data remotely
Now let's use the cornerstone of Mongoose OS remote management capabilities.
We can make any hardware function be remotely accessible. This is done
by creating an RPC service. Read more about it in the Overview and Core
libraries sections, and here we jump straight to it. Looking at
MG-RPC API doc, add RPC service Temp.Read:
#include "mgos.h"
#include "mgos_dht.h"
#include "mgos_rpc.h"

static void timer_cb(void *dht) {
  LOG(LL_INFO, ("Temperature: %lf", mgos_dht_get_temp(dht)));
}

static void rpc_cb(struct mg_rpc_request_info *ri, void *cb_arg,
                   struct mg_rpc_frame_info *fi, struct mg_str args) {
  mg_rpc_send_responsef(ri, "{value: %lf}", mgos_dht_get_temp(cb_arg));
  (void) fi;
  (void) args;
}

enum mgos_app_init_result mgos_app_init(void) {
  struct mgos_dht *dht = mgos_dht_create(mgos_sys_config_get_app_pin(), DHT22);
  mgos_set_timer(1000, true, timer_cb, dht);
  mg_rpc_add_handler(mgos_rpc_get_global(), "Temp.Read", "", rpc_cb, dht);
  return MGOS_APP_INIT_SUCCESS;
}
Build and test the final app
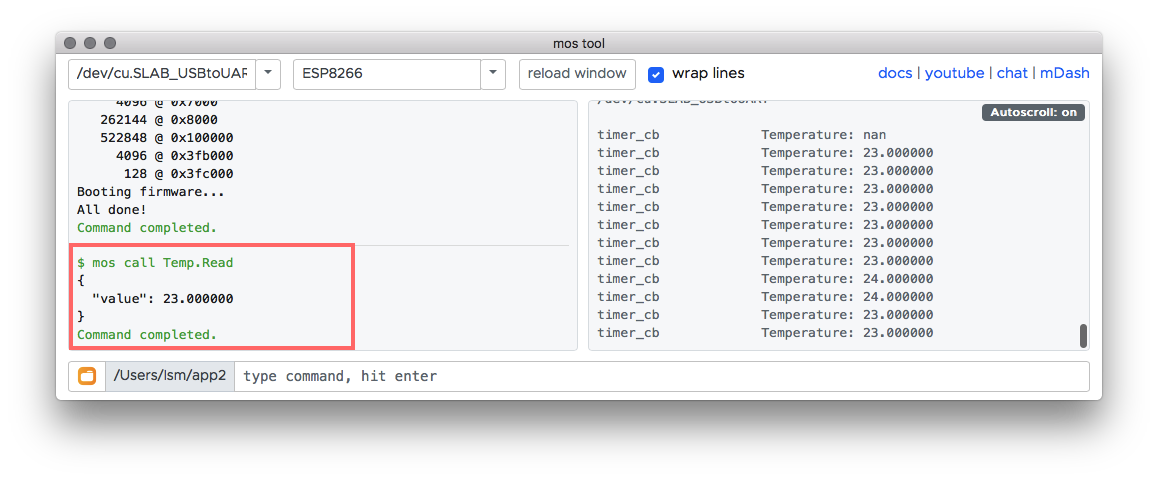
Run mos build followed by mos flash.
And now, call the device's RPC service by running mos call Temp.Read.
You will see {"value": 18.6} printed.
This call could be performed over the serial connection as well as over network connection - see RPC section to learn more.
edit this doc