Mongoose OS + AWS IoT
This tutorial demonstrates the following:
- How to build a skeleton for a commercial smart device, managed by AWS IoT
- Internet Button in 2 minutes
- How to control devices via AWS IoT device shadow
- How to report metrics data via AWS IoT
- How to perform OTA updates using AWS IoT device shadow
Setup AWS IoT
- Install an AWS CLI command line utility
- Follow the AWS CLI configuration guide to setup your AWS credentials
- Verify your credentials setup. Start command prompt (or, terminal on Linux/Mac), enter the following command:
$ aws iot list-things
It must execute without errors.
Setup device
- Pick one of the supported devices. We suggest to choose from recommended devboards
- Connect your device to your workstation via USB
- Complete Quickstart Guide steps 1-7 inclusive. As a result, your device should be connected to the Internet
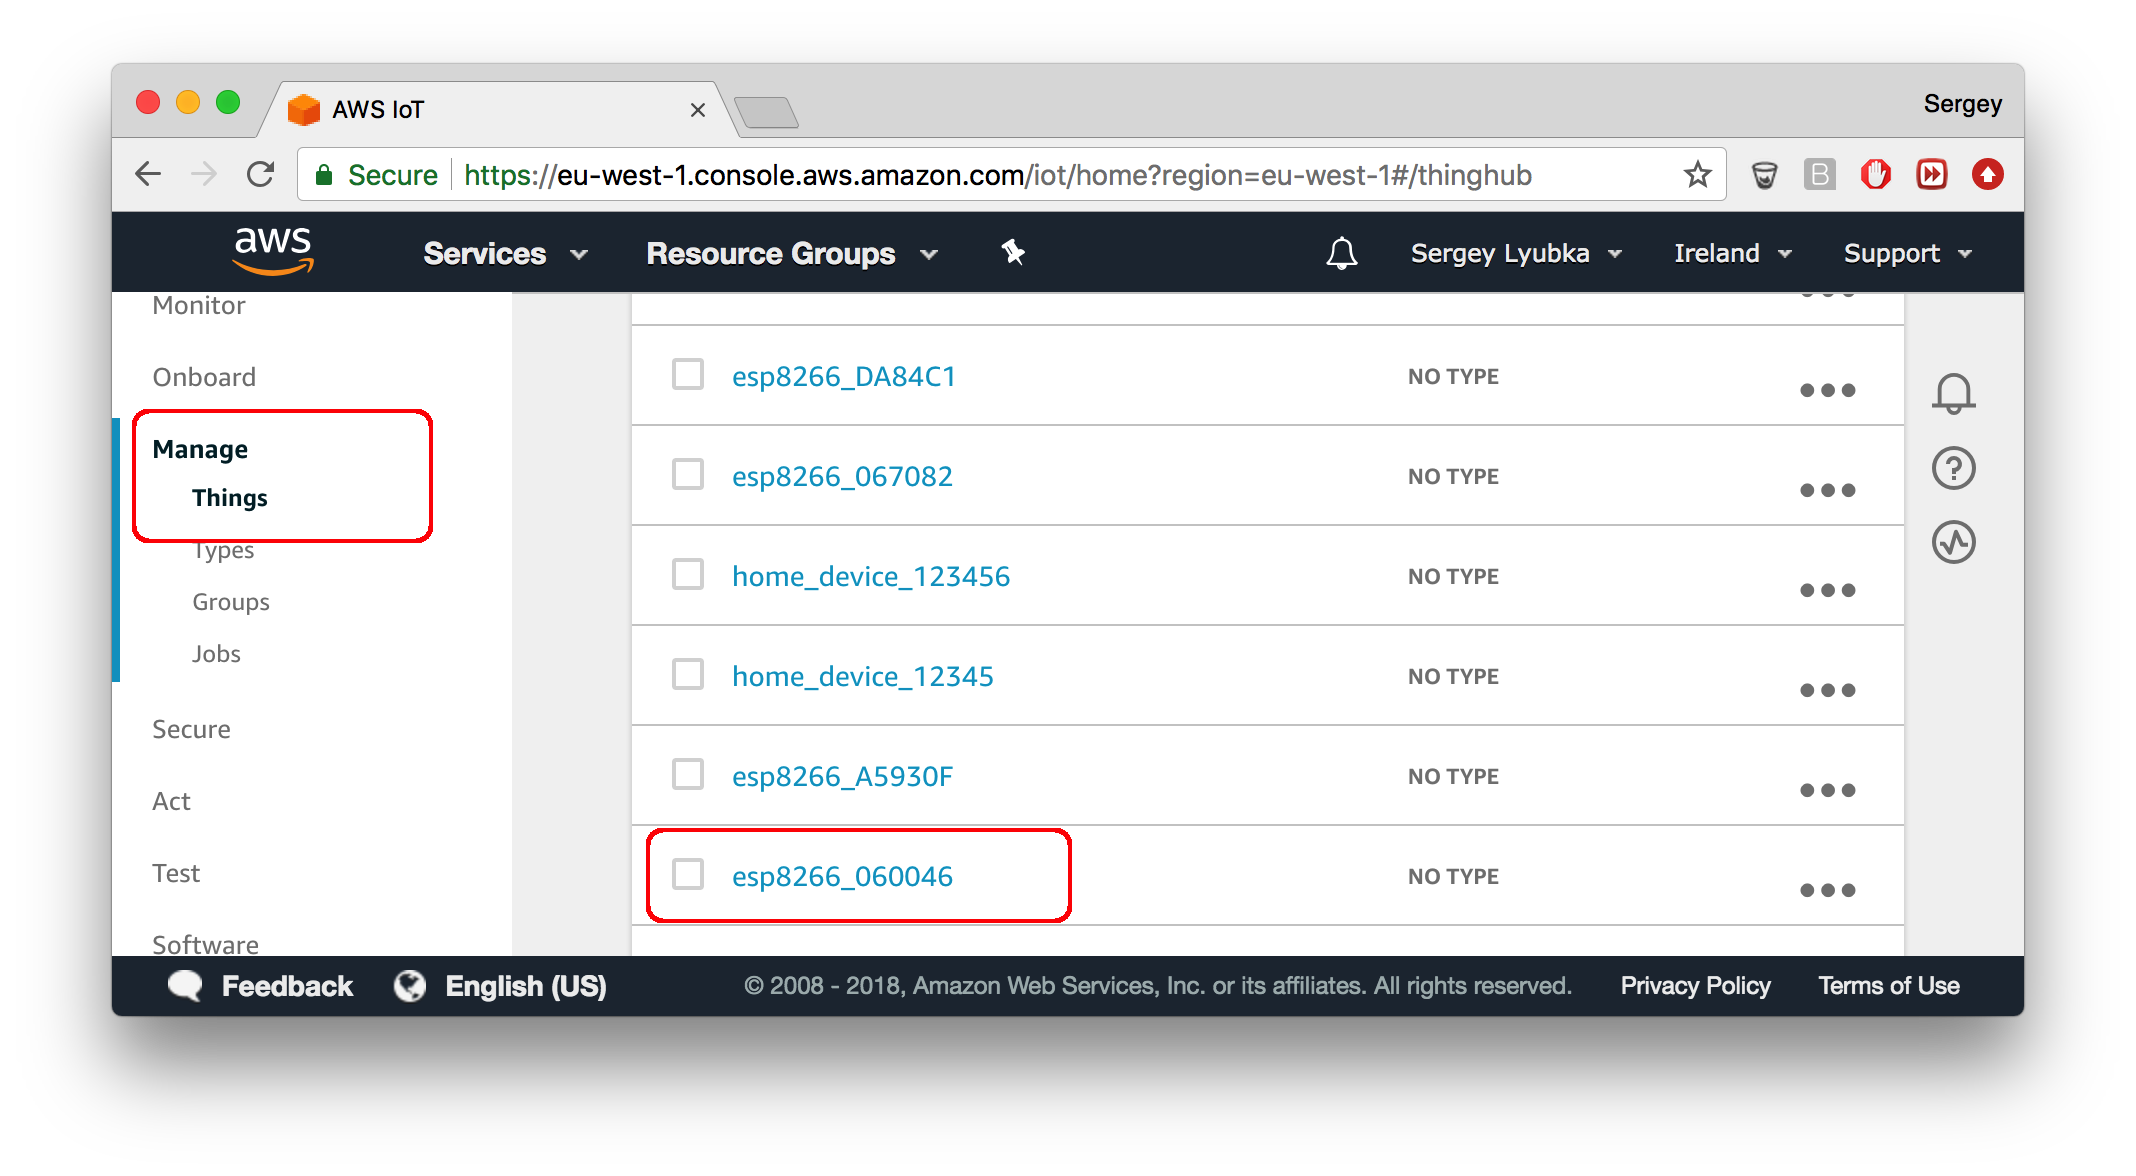
- Provision your device to AWS IoT:
mos aws-iot-setup --aws-region YOUR_AWS_REGION
This command performs certificate management for you, and onboards your device on a cloud. If your device has an Atmel ECC508A secure element attached, Mongoose OS automatically uses ECC508A chip for TLS and keeps your credentials securely stored.
Open AWS console, "IoT Core" service, and find your provisioned device in the list. On the picture, ESP8266 was used.
Internet button in 2 minutes
Check out a video below that shows how to implement Internet button functionality on AWS IoT in less than 2 minutes:
Controlling LED using AWS device shadow
The firmware that we've build following quickstart guide, contains
code that synchronises device LED with the desired.on shadow setting.
On the AWS console, click on the device ID, choose "Shadow" tab. Click
on "Edit" to modify shadow, and add the desired section:
{
  "desired": {
    "on": true
  },
  ...
}
Click "Save". Click on "Edit" again, change on to false. Click "Save".
See device logs, and see how LED turns on and off. NOTE: on some boards,
(notably, Espressif) LED pins are inverted, therefore LED turns on when
on is false, and turns off when on is true.
Reporting metrics to AWS IoT
We'll report free RAM metric using MQTT API. Note that AWS IoT has versatile rules engine, which allows to handle incoming MQTT messages in a various ways: store in Dynamo DB, forward to your Lambda function, etc etc.
Open fs/init.js file in your favorite editor and copy/paste the following:
load('api_config.js');
load('api_mqtt.js');
load('api_sys.js');
load('api_timer.js');

let topic = 'metrics/' + Cfg.get('device.id');

Timer.set(1000 /* milliseconds */, Timer.REPEAT, function() {
  let msg = JSON.stringify({free: Sys.free_ram(), total: Sys.total_ram()});
  print(topic, '->', msg);
  MQTT.pub(topic, msg, 1);
}, null);
Copy fs/init.js to the device and reboot the device:
mos put fs/init.js
mos call Sys.Reboot
In the AWS IoT console, click on "Test". Into the "Subscription topic" field,
enter metrics/# and click "Subscribe to topic". See how messages are
coming.
Direct device control via AWS IoT
If you're using Bash shell, you can use this alias to talk to your device interactively via AWS IoT:
alias mos1="mos --cert-file $(mos config-get mqtt.ssl_cert) --key-file $(mos config-get mqtt.ssl_key) --port mqtts://$(mos config-get mqtt.server)/$(mos config-get device.id)"
mos1 ls -l
init.js 330
index.html 250
...
For more in-depth explanation, see Secure remote device management with Mongoose OS blog post.
OTA update via AWS IoT device shadow
See OTA via shadow
Using AWS IoT in your custom firmware
The AWS IoT integration described above is implemented by the aws Mongoose OS library.
It provides device shadow API in both C/C++ and JavaScript, allowing developers to quickly prototype the device logic in JS before jumping to the C/C++ implementation.
Also, MQTT API is available, also for both C/C++ and JavaScript.
In order to have AWS IoT functionality in your custom application,
make sure to add aws library to your mos.yml file:
libs:
  ...
  - origin: https://github.com/mongoose-os-libs/aws  # <-- Add this!
Then, rebuild your app:
mos build