Our previous article described how Mongoose OS can connect an ESP8266 to the AWS IoT. No other solution can do this - at least we're not aware of any. This is so because AWS IoT has set the bar very high for security, demanding TLS client-side certificate authentication.
This leaves one problem - ESP8266 (and many other MCUs) stores those private TLS credentials unprotected on its flash memory. Anybody who has physical access to the device can steal private keys and get access to the cloud.
This problem is now solved. Here at Cesanta we have worked closely with AWS IoT and Microchip partners to make it possible (see 2016 re:Invent demos). In this post, we provide a step-by step instruction for ESP8266 and Microchip's ATECC508A chip. The attractive side of this combo is that it is very inexpensive: the ATECC508A is less than $1, and ESP8266 is less than $2.
Wiring
Get ESP8266 NodeMCU. Get ATECC508A - either as an ATCRYPTOAUTH-XPRO board which requires no soldering, or a bare-bones ATECC508A which requires soldering.
| Function | ATECC508A pin | ESP8266 pin | NodeMCU pin | ATCRYPTOAUTH pin |
|---|---|---|---|---|
| SDA | 5 | 10 (GPIO12) | D6 | 11 (yellow) |
| SCL | 6 | 9 (GPIO14) | D5 | 12 (white) |
| GND | 4 | Any suitable GND | 19 (black) | |
| VCC | 8 | Any suitable 3V3 | 20 (red) | |
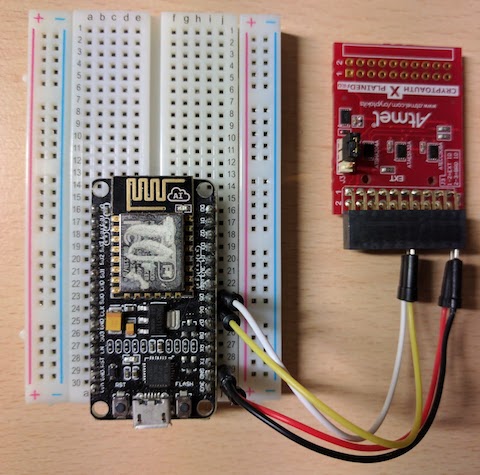
Wiring for ATCRYPTOAUTH-XPRO:
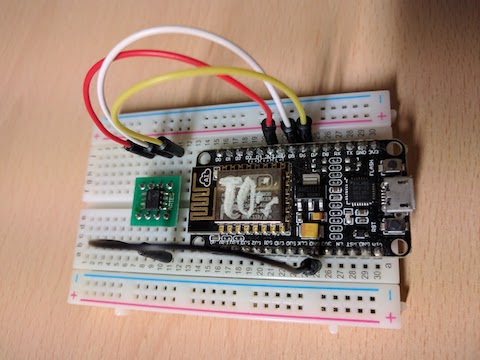
Wiring for the bare-bones ATECC508A:
Follow the examples
When everything is in place, just follow the MQTT example. The mos aws-iot-setup command will automatically detect the ATECC508A crypto chip and use it.
Contact us if you have any questions.
Enjoy!