Internet of Things is about connecting physical objects (things) to the Internet. Technically, that is done by attaching a computer to the thing. A computer is attached in a way it can read data from the thing and report to the Internet, and also it can receive commands and control things's state:

Usually COMPUTER is directly wired to the THING, and COMPUTER <-> INTERNET connection could be either wired (e.g. Ethernet), or wireless (e.g. Bluetooth, WiFi). What is COMPUTER? It could be your laptop or desktop computer:

That's quite an expensive IoT solution. Costly. Power hungry. Also, big. You can hardly use your laptop with your fitness tracker while running.
Well, there are smaller computers, less power hungry, and less expensive!

For example, Raspberry PI which costs around $40, BeagleBone for around $60, Intel Edison for around $70, and many others. These computers usually run Linux, they are quite handy for prototyping, but cannot be used for large class of IoT solutions because of their dimensions, power requirements, and price.
That's why the real deal are microcontrollers (also called MCUs, or micros):

There is a huge diversity of microcontrollers on the market, designed for various needs. For the IoT, there is a range of inexpensive, low power, and tiny microcontrollers that are suitable for real commercial as well as educational products.
What is a microcontroller
A microcontroller is a small computer on a single silicon chip. In a very simplified form, it looks like this:

It's a small black box with a bunch of wires (pins) sticking out from it. There are pins for powering the MCU (ground and power pins), and pins for attaching external things - sensors, actuators, buttons, and so on. These pins are called IO (input/output) pins.
For example, to create a WiFi internet button, you need to get a WiFi-enabled microcontroller, get a button, attach a button to the IO pins, and program the microcontroller to send a message to the cloud backend when a button is pressed:

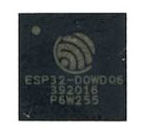
Inside the MCU, there is a processor, memory, and other circuitry like radio transceiver. For example, this ESP32 MCU has a built-in WiFi and Bluetooth inside, and looks like this:
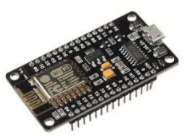
During development, people do not work directly with MCUs cause it's hard to wire them. Instead, modules and development boards are used. Those modules make it easy to power the MCU and attach peripherals. Here is an example of NodeMCU ESP8266 board - you can plug it to your laptop easily:
Programming microcontrollers
Microcontrollers do not have much memory and processing power - that's why they are so cheap. For example, Nordic Semiconductor's nRF52 has 64k RAM and 512k flash. A popular ESP8266 has about 40k available RAM. That means there is no way to run software like Windows, or Linux, or node.js on them. That means, programming these small computers cannot be done with conventional tools and frameworks.
There are many approaches to the tackle the MCU development, but generally speaking, it is not easy for a new person to start. One needs to know C/C++, and spend (sometimes significant) time on setting up programming environment.
Mongoose OS is an operating system for microcontrollers that makes it easy to program them for both newbies and professional developers. With Mongoose OS, the time it takes to setup programming environment is reduced to a minute, or less.
Your first IoT program with Mongoose OS
Mongoose OS supports several popular microcontrollers: ESP32, ESP8266, TI CC3200, STM32. First, get one of the supported boards, for example ESP8266 NodeMCU which you can buy on Aliexpress for about 3 dollars, connect it to your computer, then follow these steps:
- Navigate to https://mongoose-os.com/software.html and download
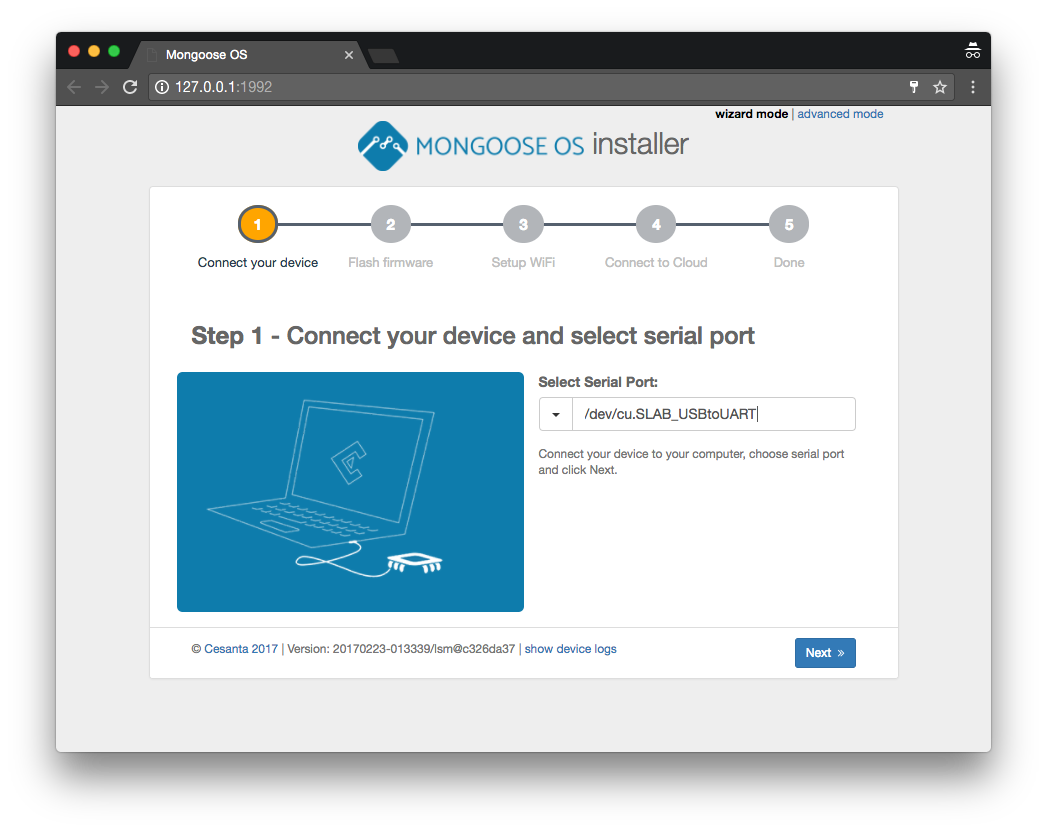
mostool. - Start
mosand follow the setup wizard:
- When installation is complete, click on "Start prototyping" to switch to the file manager:
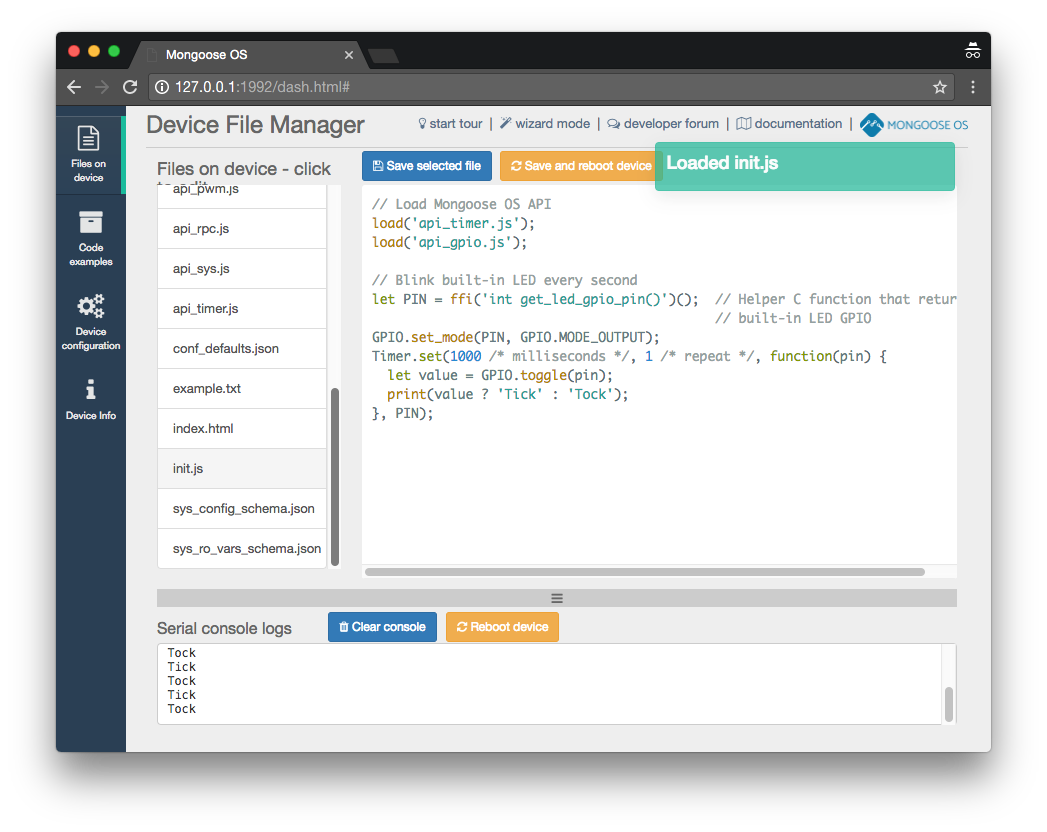
- Click on
init.jsfile, change messageTicktoHello!and press "Save and reboot device" button. You'll see new message in the device log.
This 2-minute video covers all steps:
This simple flow demonstrates how easy it is to start with microcontroller development and Mongoose OS. For more in-depth introduction, see documentation and video tutorials.
Have a question? Ask on our developer forum or send us a message.