Overview
Espressif's ESP32 is a rather unique chip: it supports both Bluetooth and WiFi.
While WiFi support has been in Mongoose OS from day 1, we began working on adding Bluetooth support to Mongoose OS only recently and would like to share the first results of that effort today.
Bluetooth is an umbrella for a diverse set of protocols and functionality, and in our work we decided to focus on provisioning first: how to get device connected to WiFi without physically attaching it to a PC to enter configuration?
Part of the Bluetooth spec are Generic ATTribute profiles (GATT), which allow device to expose a set of attributes (also called characteristics), which can be queried and modified. There is a set of predefined profiles for common functions such as blood pressure and heart rate monitors, battery or even HTTP proxy. However, applications can implement their own profiles, and that's what we did for Mongoose OS: we implemented a configuration service that allows modifying the system configuration (see overview of the configuration system here) and an RPC service, which allows sending and receiving RPC requests over BLE (see more details about our RPC subsystem here). And because attribute profile is generic, there are existing apps that can work with this facility (this is in contrast with Espressif's own blufi provisioning mechanism, which requires a special app).
Now, let's see how it all works.
Configure WiFi settings over Bluetooth
- First, flash the latest ESP32 firmware:
$ mos flash esp32
On the console (mos console), you should see the following messages:
[Jul  4 17:49:05.704] mgos_bt_common_init  Bluetooth init ok, advertising enabled
[Jul  4 17:49:05.717] esp32_bt_gatts_ev    Starting BT service 5f6d4f53-5f43-4647-5f53-56435f49445f
[Jul  4 17:49:05.726] mgos_http_server_ini HTTP server started on [80]
[Jul  4 17:49:05.741] esp32_bt_gatts_ev    Starting BT service 5f6d4f53-5f52-5043-5f53-56435f49445f
-
Now, get yourself a Bluetooth Low Energy app. There are quite a few available, we'll use the one called "BLE Scanner" (here it is for Android and iOS).
-
The device should be visible in the scanner as
esp32_XXXXXXwhereXXXXXXis a unique number (it's the last 6 digits of the WiFi AP MAC address):
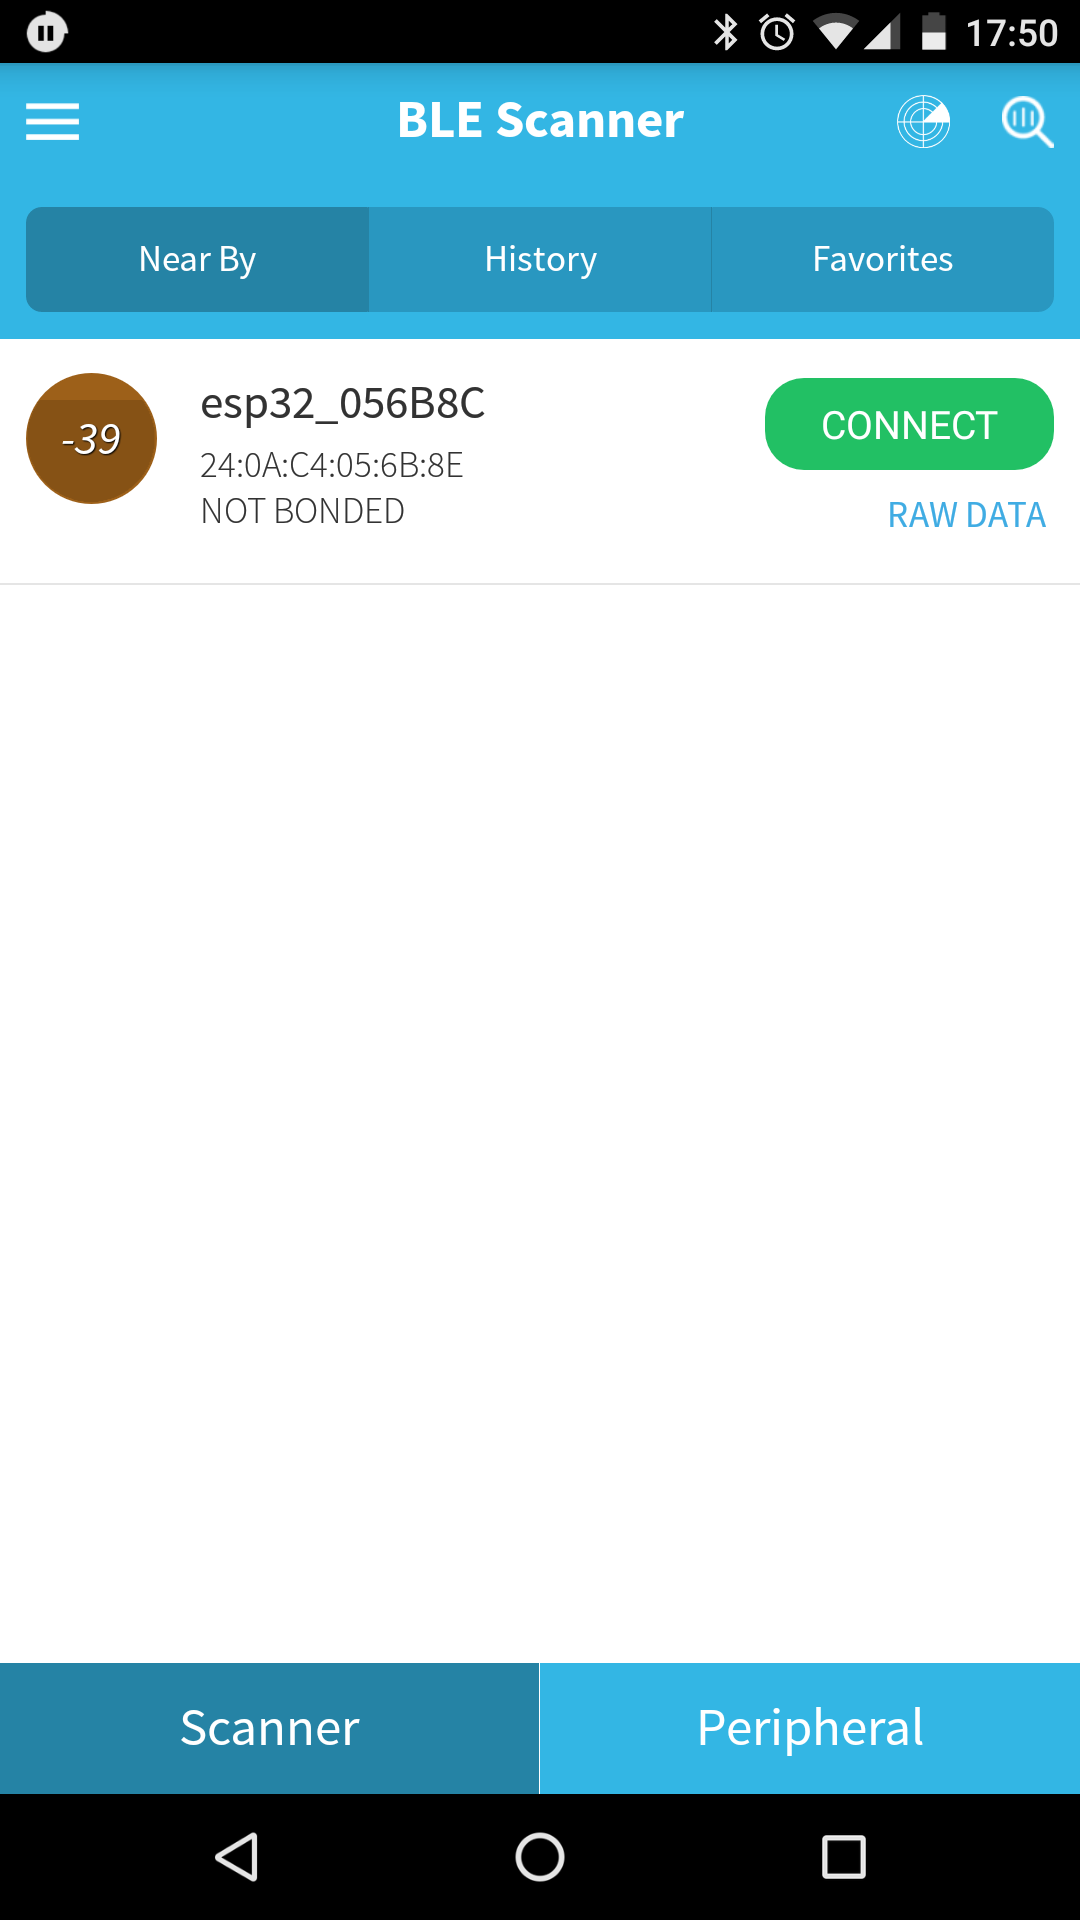 |
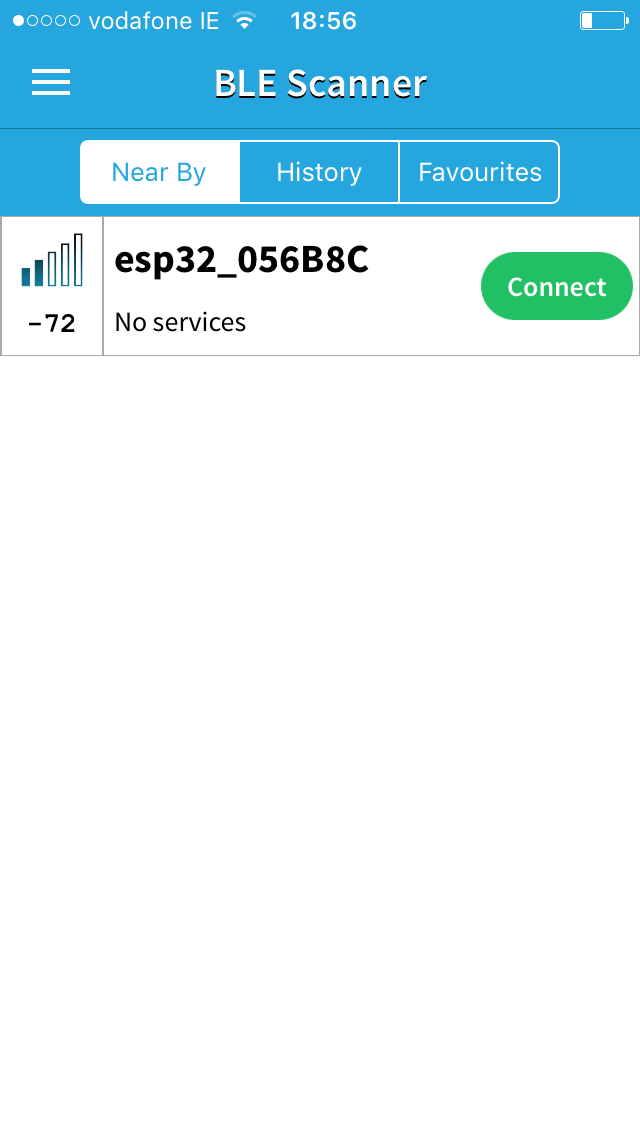 |
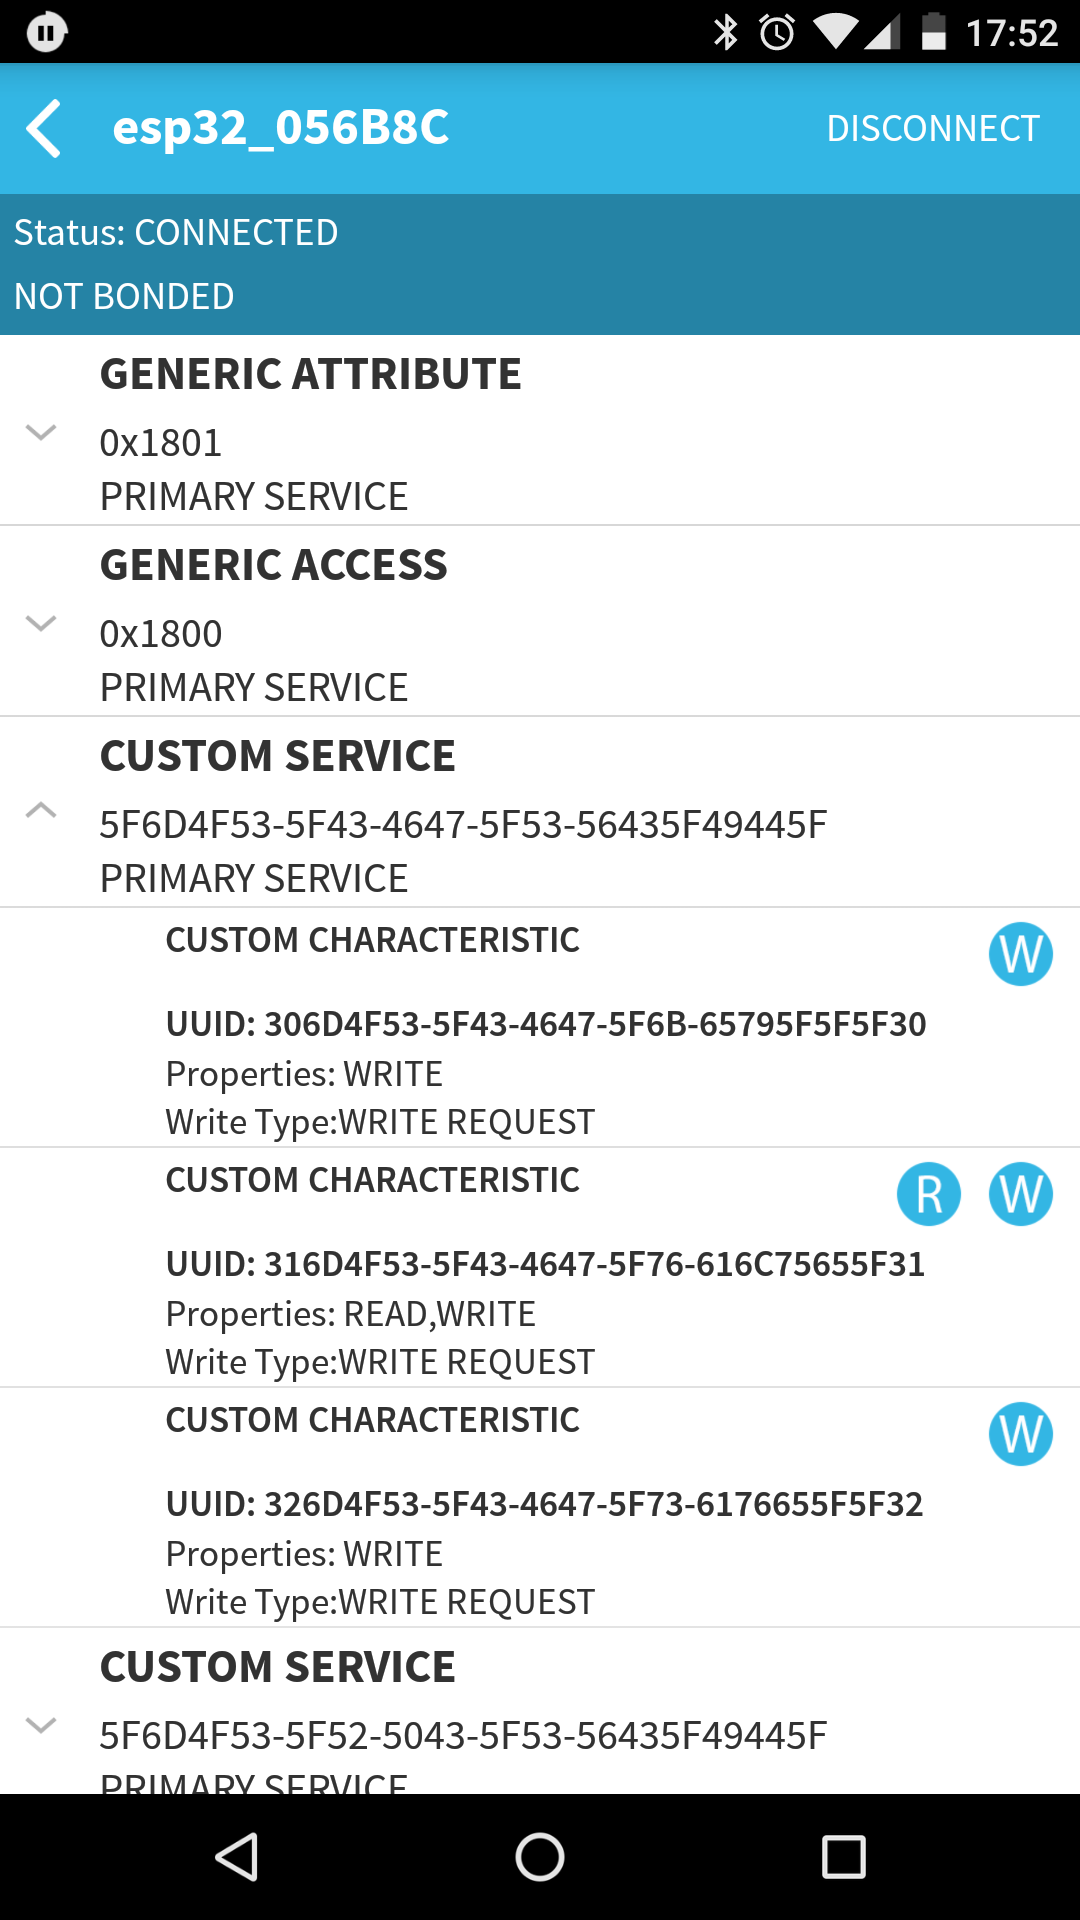
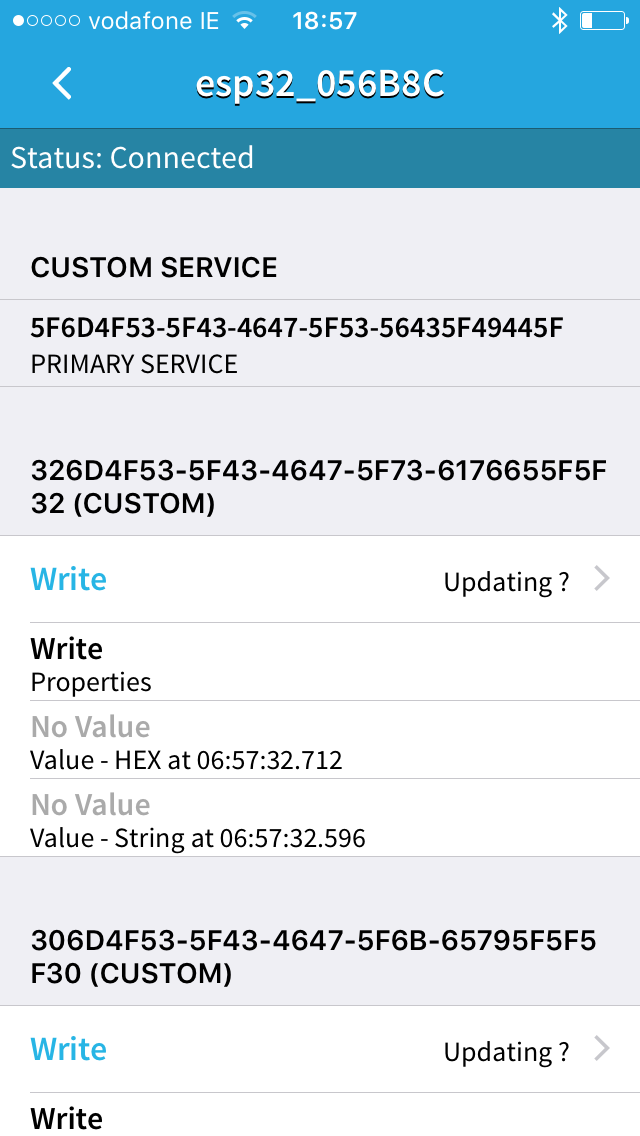
- Tap the green "Connect" button. You should see the services provided by the device:
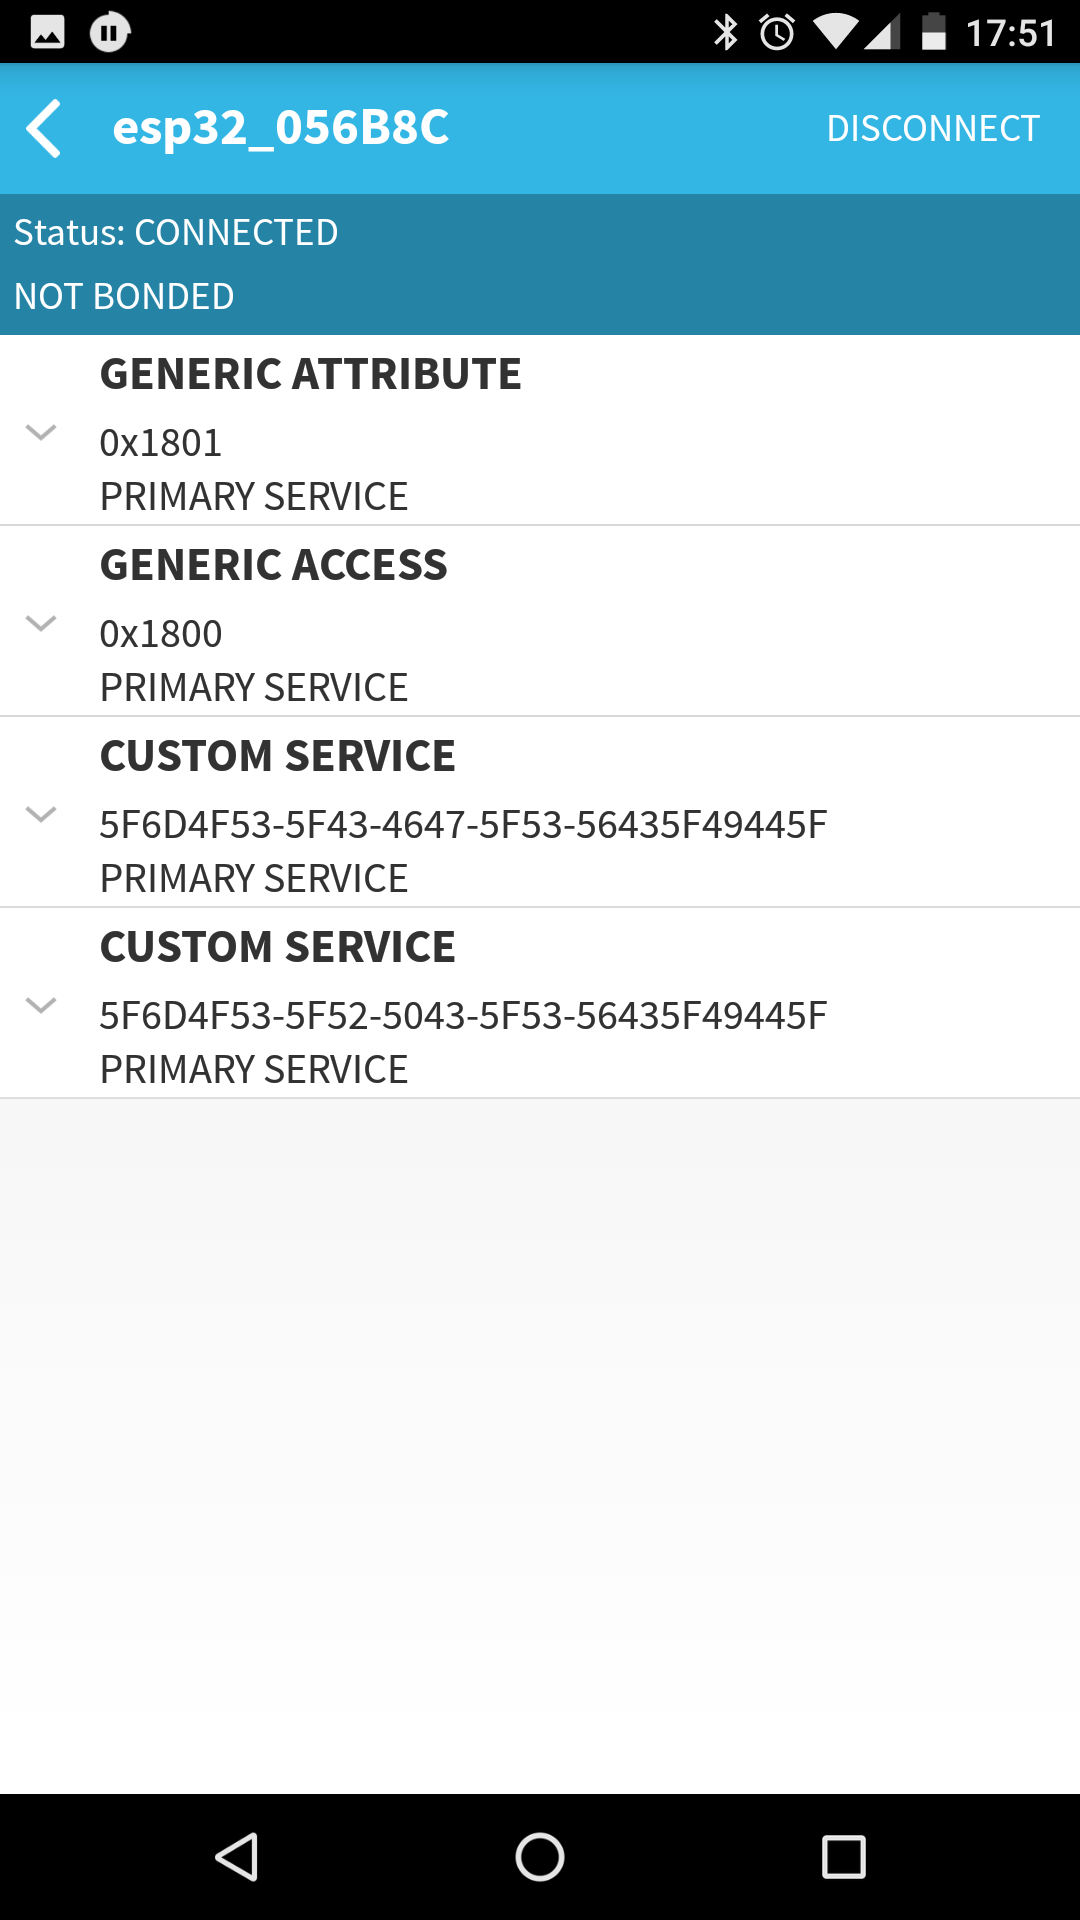 |
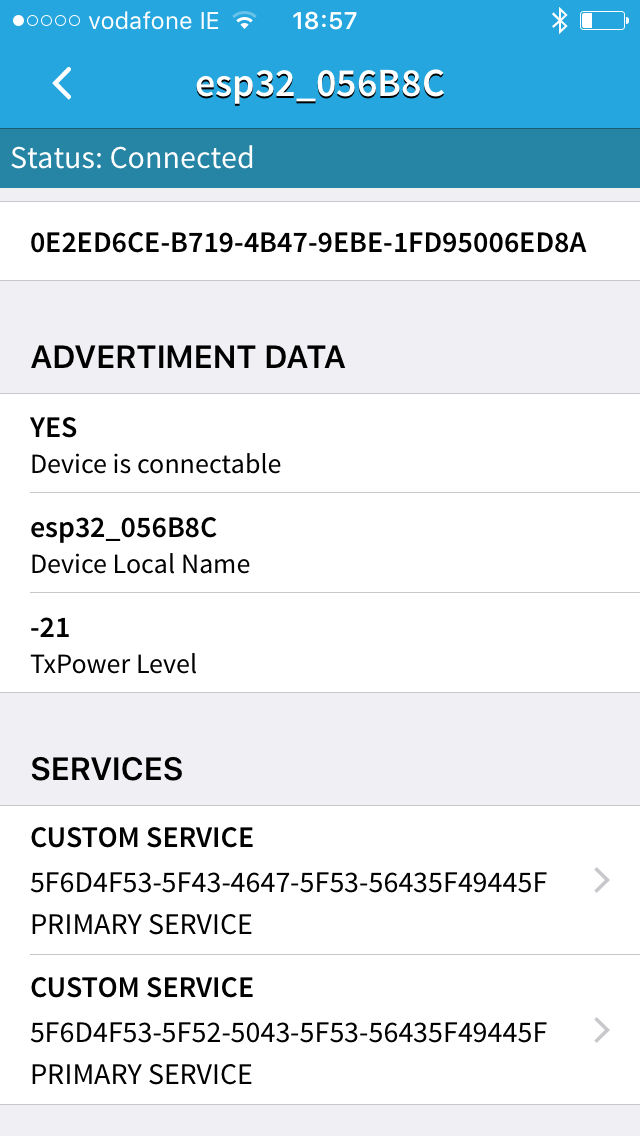 |
- 128-bit UUIDs are not the most user-friendly way of describing a service, but this is what we have to deal with for custom services. The first on the list, the one with
5F43in the second group, is the configuration service and is the one we'll use today (the other one is the RPC service, you can read more about it here). Click on it:
 |
 |
-
Great, more cryptic numbers. Well, yes. But there is a system to this madness:
- The one starting with
30is the write-only attribute that specifies configurationkeyto change, we'll call it key. - The one starting with
31is thevalueattribute, reading it (after having specified the key) will yield the current value, writing it will enter the new value for a config key. - The one starting with
32is thesavecontrol point: when written to, it will apply the key and value entered.
Note: Android app keeps them nice and in order but iOS does not, so pay extra attention.
- The one starting with
-
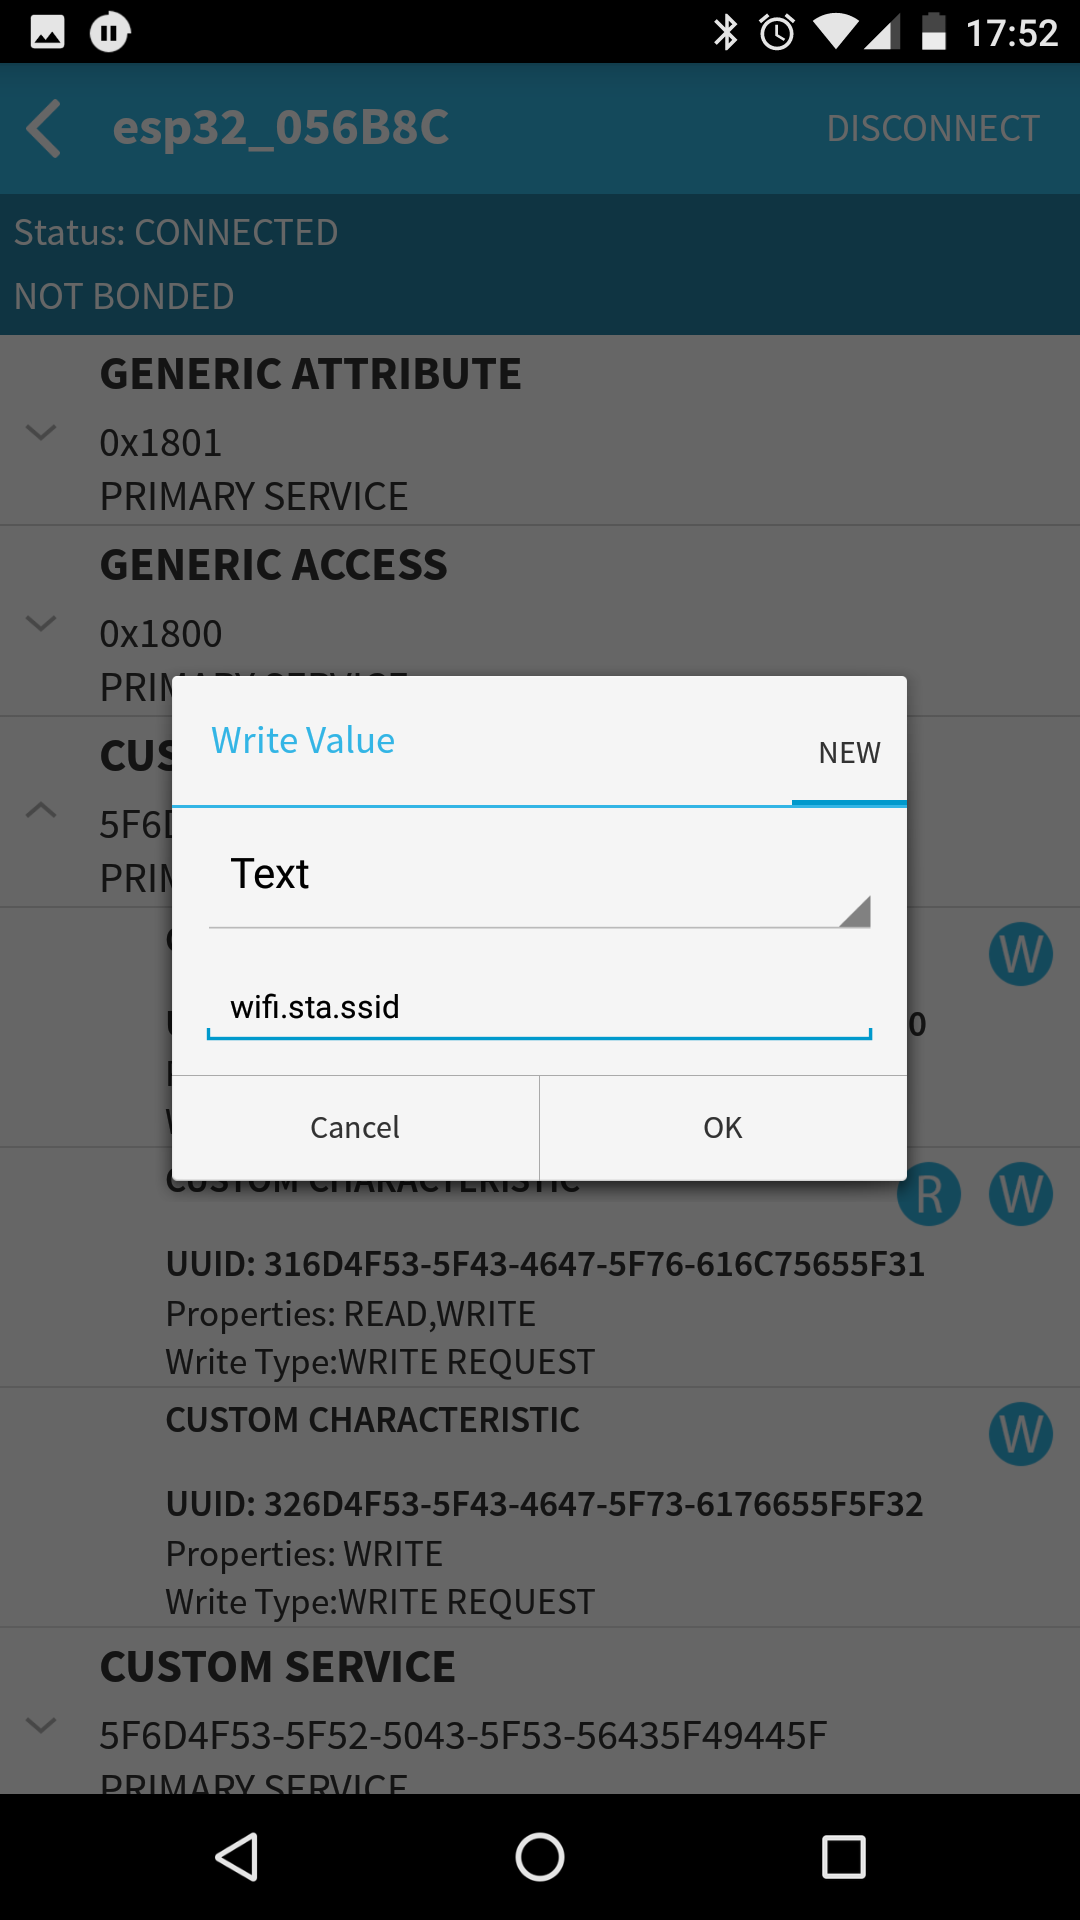
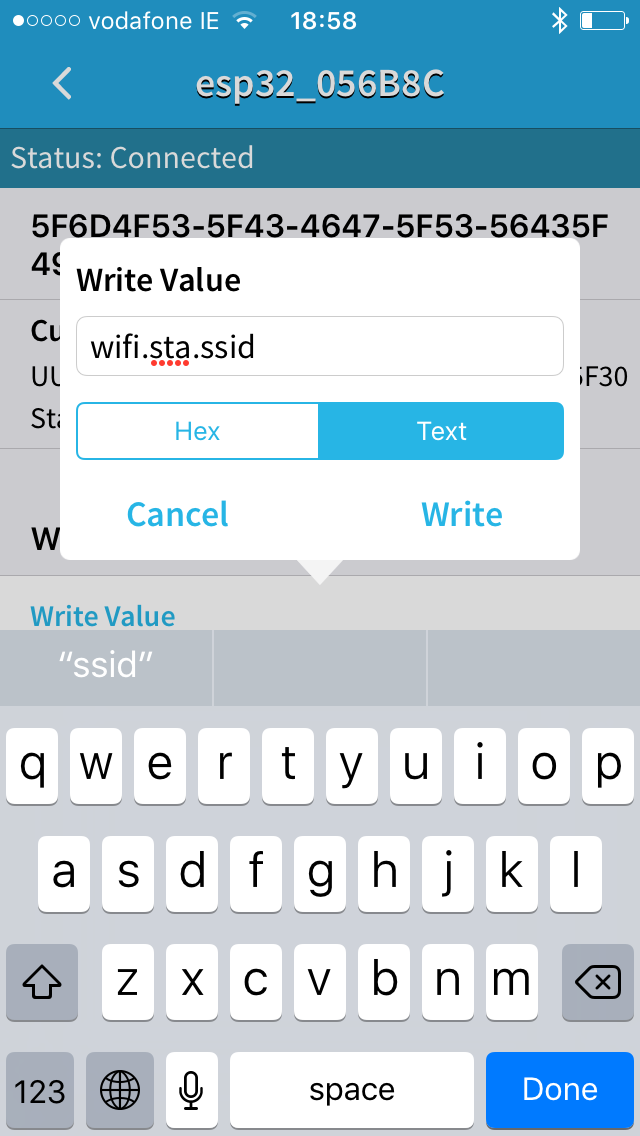
Now, let's enter the WiFi network name to connect to (technical name - SSID). It's controlled by the
wifi.sta.ssidconfiguration key and value is a string - the network name.- On Android app, tap the little
Wnext to thekeyattribute, it's the first in the list; on iOS it's the second one and you'll need to tap the blueWritelink. In the dialog box that pops up, enter the config key name -
wifi.sta.ssidand confirm:
- On Android app, tap the little
 |
 |
- Now write your WiFi network name to the
valuecharacteristic (the one starting with31). In our office, network name isCesanta:
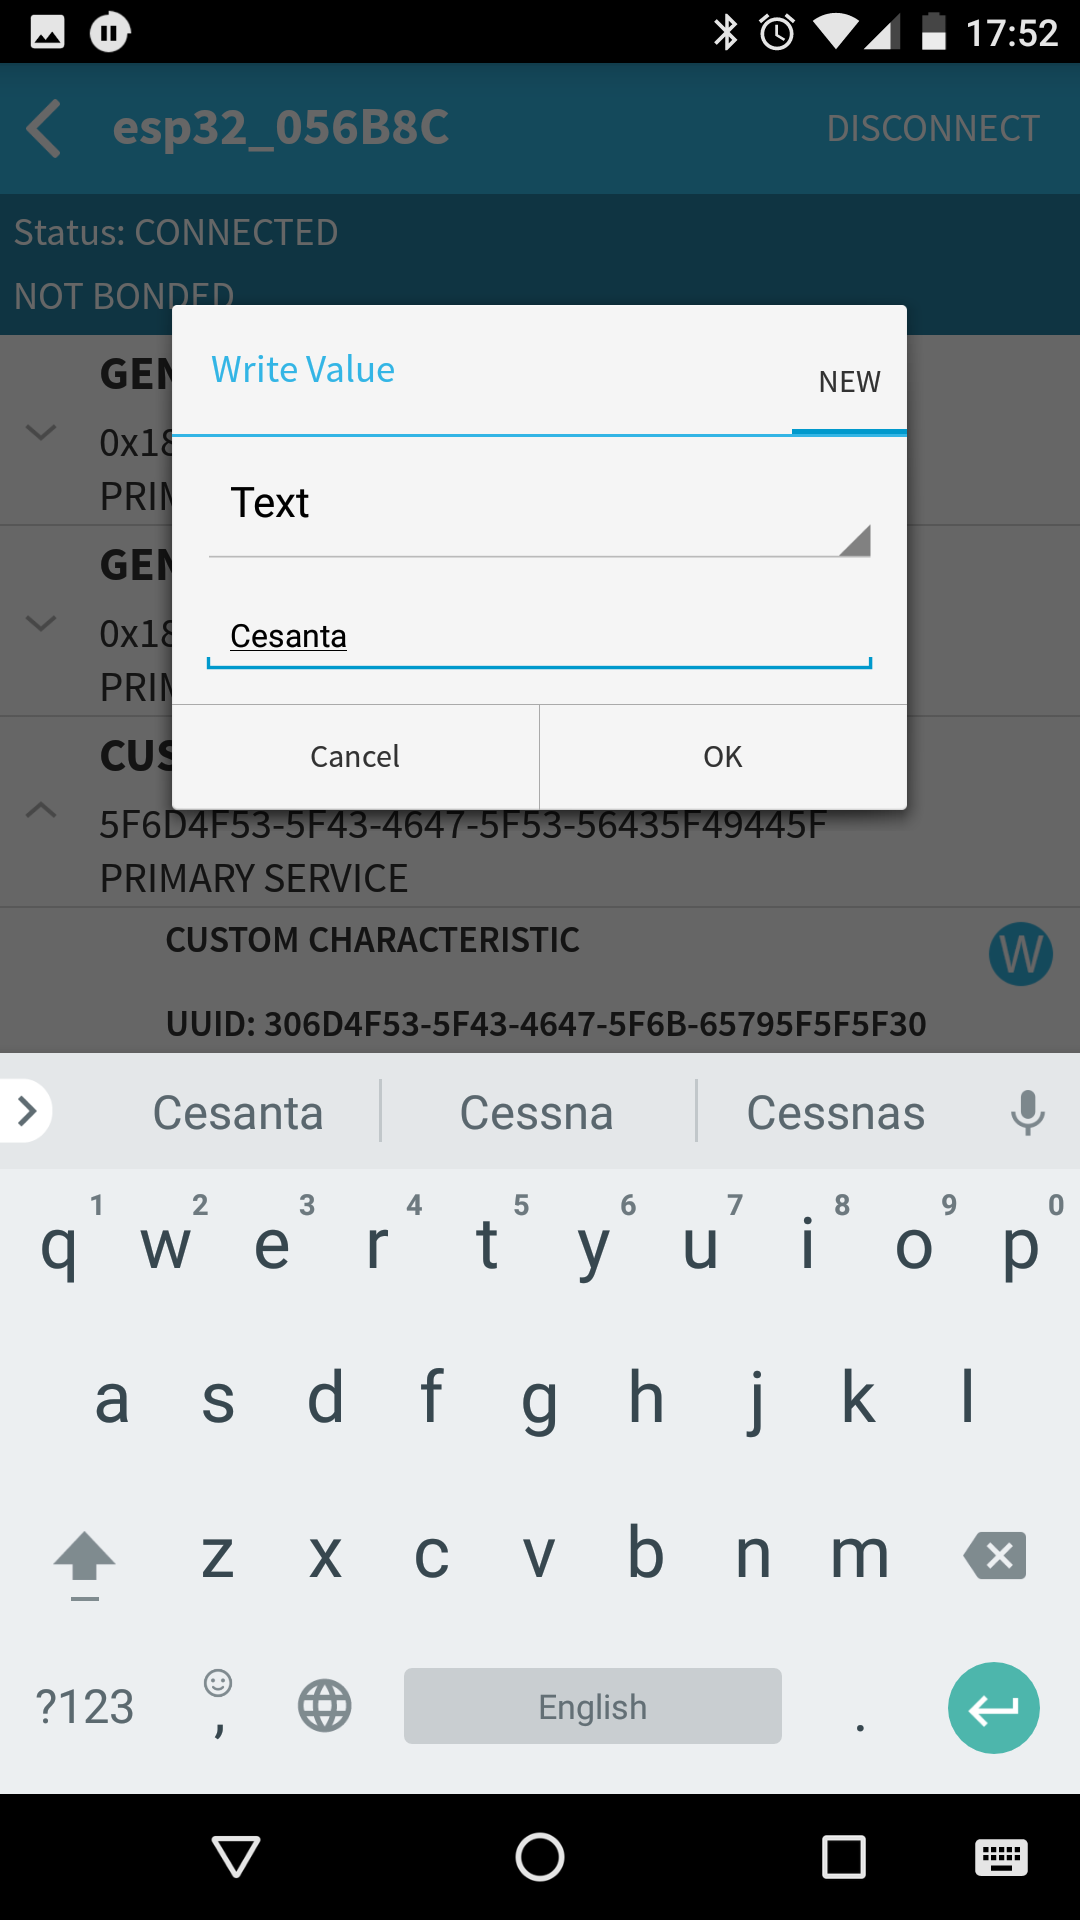 |
 |
- Set the value by writing
0to thesaveattribute (the one starting with32). You should see confirmation in the device's console log:
[Jul 4 17:52:46.853] mgos_bt_svc_config_s 'wifi.sta.ssid' = 'Cesanta'
-
Use the same 3-step process to set
wifi.sta.pass- the WiFi network password.- If your network does not require a password, enter a single hex byte
0x00into thevalueattribute.
- If your network does not require a password, enter a single hex byte
-
Finally, set the
wifi.sta.enabletotrue, however, this time enter2into thesaveattribute, which will save the configuration changes and reboot the device. You will see the following on the console:
[Jul  4 17:53:15.130] mgos_bt_svc_config_s 'wifi.sta.pass' = '*SECRET*'
...
[Jul  4 17:53:49.058] mgos_bt_svc_config_s 'wifi.sta.enable' = true
[Jul  4 17:53:49.205] save_cfg             Saved to conf9.json
[Jul  4 17:53:49.212] mgos_system_restart_ Rebooting in 100 ms
[Jul  4 17:53:49.318] mgos_vfs_umount_all  Unmounting filesystems
[Jul  4 17:53:49.324] mgos_vfs_dev_close   0x3ffbccd4 refs 0
[Jul  4 17:53:49.328] mgos_system_restart  Restarting
[Jul  4 17:53:49.335] event_handler        event: 13
...
[Jul  4 17:53:52.378] mgos_wifi_setup_sta  WiFi STA: Connecting to Cesanta
...
[Jul  4 17:53:56.456] I (9159) wifi: connected with Cesanta, channel 11
[Jul  4 17:53:56.472] mgos_wifi_on_change_ Wifi: connected
[Jul  4 17:53:56.998] I (9689) event: ip: 192.168.1.38, mask: 255.255.255.0, gw: 192.168.1.1
[Jul  4 17:53:56.998] mgos_wifi_on_change_ WiFi: ready, IP 192.168.1.38, DNS 192.168.1.1
[Jul  4 17:53:57.005] mgos_bt_wifi_changed WiFi connected, disabling Bluetooth
[Jul  4 17:53:57.103] save_cfg             Saved to conf9.json
Please note, the last two lines: the default behavior for Bluetooth is to disable itself, once successfully connected to WiFi. The reason for that is, as you may have noticed, no authentication was required to modify device's configuration. Currently, there is no way to protect these Bluetooth services. Expect this to change in the future, but for now the default is to shut them down once the device has been provisioned. If you want to keep BT running after WiFi is configured, you'll need to set bt.keep_enabled to true.
So, this is all for today. Go ahead, try it yourself. If you have any questions or comments, hop on our Gitter channel, post to our forum or send us a message.